When it comes to drywall repair, having the right tools can make all the difference. Whether you’re a DIY enthusiast or just tackling a small home project, these essential tools will help you get the job done quickly and efficiently.
Here’s a handy list of the must-have tools for drywall repair:
With these tools in your kit, tackling drywall repair will feel a lot less daunting. Just remember to take your time and follow the steps carefully for a clean finish!
Step-by-Step Repair Process
Ready to tackle that drywall repair? Don’t worry; it’s easier than you think! Here’s a simple step-by-step process to get your walls looking like new.
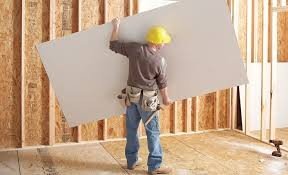
Step 1: Gather Your Tools
Step 2: Clean the Area
Start by clearing the area around the damage. Remove any loose pieces of drywall and dust. This helps the joint compound stick better and provides a cleaner finish.
Step 3: Apply Drywall Tape
If you have a larger hole, place a piece of drywall tape over it. This adds strength and reduces cracking. For smaller dents, you can skip this step.
Step 4: Add Joint Compound
Use your putty knife to spread a layer of joint compound over the tape or the damaged area. Smooth it out as best as you can. Don’t stress if it doesn’t look perfect—this is just the first coat! Let it dry completely.
Step 5: Sand and Finish
Once dry, lightly sand the area until it’s smooth. You want it to blend with the rest of the wall. After sanding, wipe away the dust and apply a second layer of joint compound if needed. Finish with primer and paint to make your drywall repair blend seamlessly with the surrounding wall.
Tips for Seamless Finishes
When it comes to drywall repair, getting that smooth finish can make all the difference. Here are some practical tips to help you achieve a professional look without the hassle.
1. Prepare the Surface – Begin by cleaning the area around the repair. Remove any loose debris, dust, or old tape. A clean surface helps the new compound stick better and creates a smoother finish.
2. Use Quality Tools – Invest in a good quality taping knife and drywall compound. A wider knife can help blend the edges better, while a lightweight compound is easier to work with and dries faster.
3. Apply Thin Layers – When applying joint compound, less is more. Use thin layers and let each layer dry completely before adding the next. This reduces the chance of cracks and ensures a smoother finish.
4. Sand Gently – After your final coat dries, lightly sand the area with fine-grit sandpaper. Be careful not to over-sand, as you might remove too much compound. Wipe the area clean with a damp cloth before painting.
By following these tips, your drywall repair will look seamless and blend well with the existing wall. Happy repairing!
Common Mistakes to Avoid
When it comes to drywall repair, even seasoned DIYers can slip up. Here are some common mistakes to steer clear of:
Avoiding these common pitfalls can make your drywall repair project much simpler and more enjoyable, so you can achieve those perfect walls faster.